When you process plenty of photographs, it's useful to have a workflow to make the work systematic and therefore, faster. Also, it ensures that you don't forget to do something to your images before you send them out. There's many ways to go about it and I confess that I don't have a set one. Often the recommended sequence will be something like 1) indexing the images (adding tags for easy searching), 2) initial cropping and cleaning up the image, 3) image adjustments, 4) sharpening, 5) final cropping, and 6) compressing and saving. These steps are highly condensed and vary widely among Photoshop users. Today we're going to tackle something that belongs to step 2: straightening out a picture.

You could very well straighten out a picture after you've done everything else, but I like to do it first because it helps to orient your mind properly as to what the picture should look like. Looking at a crooked picture for too long gives you a pervasive feeling that something is wrong with the picture, and it's bothersome.
Now, people who work with tripods (and you should really, at least for food pictures) don't usually have this problem, but if you don't have a tripod or if you take travel pictures, it can get frantic and the pictures don't come out straight. Fixing it is extremely easy in Photoshop.
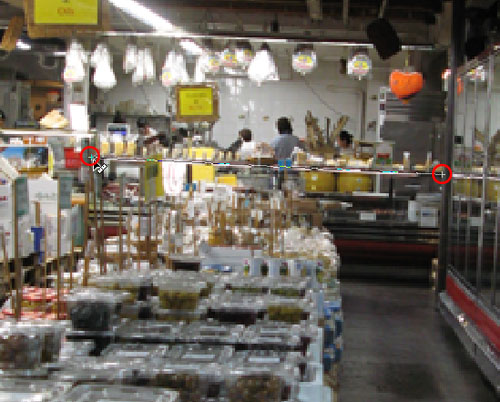
Hold the mouse button down over the Eyedropper Tool so the panel flies out. Select the Ruler Tool. (Take note that any of these tools in the panel can take the place of the Eyedropper Tool in the Toolbox, so don't panic.)
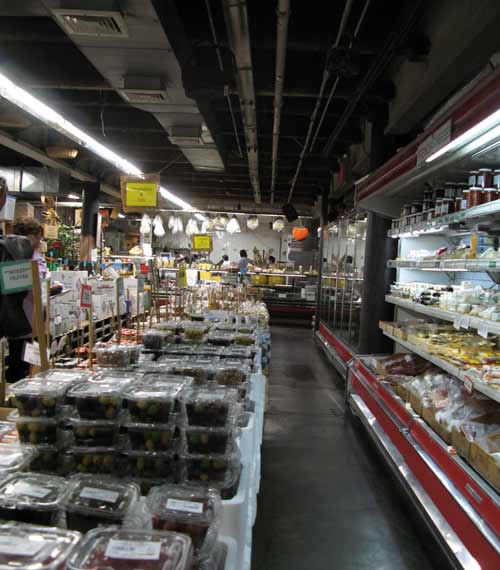
Drag the ruler tool along a supposedly perfectly horizontal line (or a supposedly perfectly vertical line can also work) in your image. It should be as close to the proper horizon as possible. See those beams in the ceiling in the original picture? If I had used them, the picture would not straighten up properly, as my camera tends to distort lines the further they are from the center of the lens. To make the line as accurate as possible, I recommend choosing two points that are far away and well-defined. If they're too close together, small slips of the mouse mean a big change in the angle.
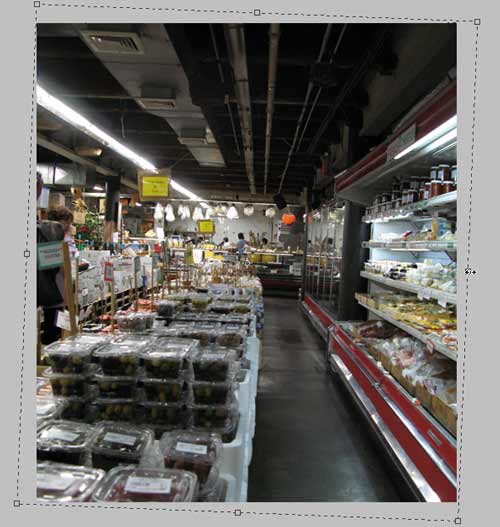
Select Image > Image Rotation > Arbitrary...
The correct angle and direction (clockwise or counter-clockwise) will be determined for you. Press OK.
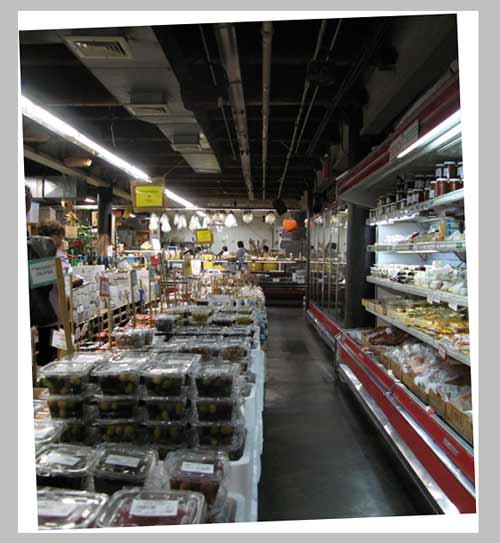
Voila! Perfectly straightened picture. You may want to crop out the useless white areas, but that also means cropping out areas of the image, which may be useful for later. So that will be one of the last steps in the workflow (more on this much later).
Photoshop Elements
This is also possible for not much more effort in Photoshop Elements.
Select the Crop Tool.
Drag it over the image, with one of the edges of the formed box close to the line which is supposedly perfectly horizontal.
Hover your mouse pointer just outside one of the corners of the box until it turns into the rotating pointer.
Rotate the box until the top edge aligns with the line you want to be horizontal. You can pull on any of the 8 handles to help you guide the lines correctly and exactly to the desired horizon. When you've got the right angle...
... Move the mouse pointer away from the area outside the corners so it turns from the rotating pointer to the resizing pointer. Pull on any of the 8 handles of the bounding box so the boundaries of the box extend beyond the original image. If you don't do this, part of your image will be cut off, though if you want to skip to your final crop already, you might want to take the shortcut and chop off areas of the image already.
Click on the green check mark below the bounding box to set the crop, and the image will automatically rotate to the correct angle. Yay!
As always, if you're getting familiarized with these tools, just play with your images (feel free to download my first image of the grocery above). Use vertical lines as your guide. Or maybe turn correct images into lopsided ones. Just get a feel for the tools until it becomes natural!