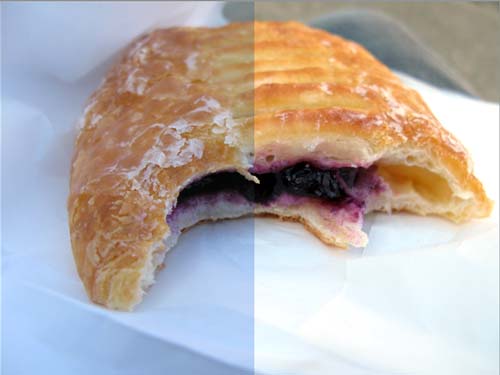
Why did I say "in your terms"? Well, sure, there are some image editing functions that are "automatic", and they rely on artificial intelligence to determine what makes a picture look good (and it's based on how it thinks a histogram should look). Making your own adjustments allows greater creative control, and can take it from computer-determined "pleasant" to amazing.
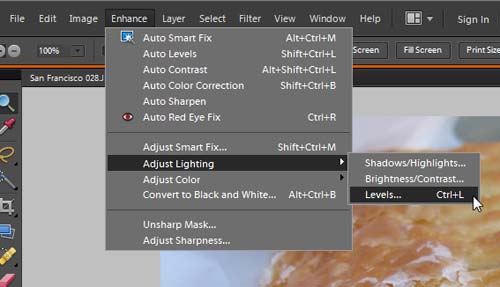
This lesson works in both Photoshop Elements and Photoshop and for the actions in this lesson, work exactly the same (I'll tell you if something's different). To bring up the Levels dialog in Elements, press Ctrl-L (Command-L on the Mac), or choose Enhance > Adjust Lighting > Levels.
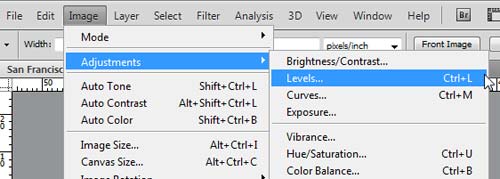
In Photoshop, press Ctrl-L (Command-L on the Mac), or choose Image > Adjustments > Levels.
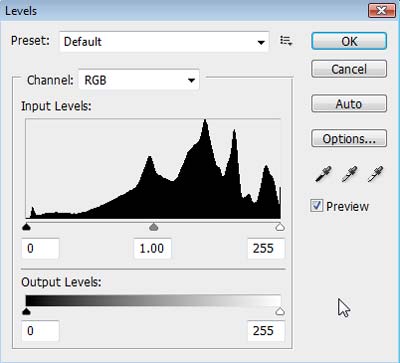
What you'll get is this dialog. Let's take a look at its functions:
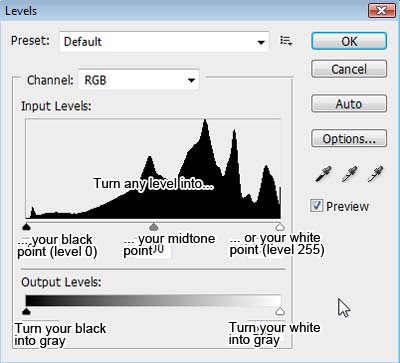
Preset is only available in Photoshop. You can use several predefined Levels adjustments or save your own. Choosing Default resets the Levels. (In Elements, you can just click the Reset button to do this.)
Channel chooses which base colors you'll be adjusting. For the sake of this basic lesson, we'll just choose RGB.
Input Levels is where you'll do much of the work, as this is where you increase contrast and adjust brightness/darkness. There is a histogram of your current image and three sliders under it. You can move the sliders or enter a number. The Black Slider determines which Level becomes Level 0, or pure black. The Gray Slider determines what point becomes the 50% midtone. The White Slider determines which Level becomes Level 255, or pure white. You'll notice that you can also enter specific numbers below, but that's rarely necessary.
Output Levels is used less because its end result is usually decreased contrast and duller colors. The Black Slider determines how gray you will turn your blacks (lightening the whole image). The White Slider determines how gray you will turn your whites (darkening the whole image).
The Droppers let you pick an area in the photo to specify as the white point, the black point, and the 50% gray point.
Before anything else, take note that Levels is a destructive process. If you make a Levels change and save your image (and close it), you can never get your image back the way it was. So back-up your images or make duplicate layers if you like to keep originals. In the future we'll take a look of how to do this non-destructively.
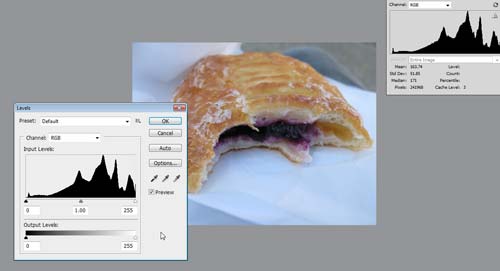
This is what your workspace will look like. You can open the histogram panel (even while the Levels dialog is on) and you can see how the histogram changes while you're previewing the image changes!
Note: in the histogram pictures, the "before" histogram is below the "after" histogram.)
Making Highlights Brighter
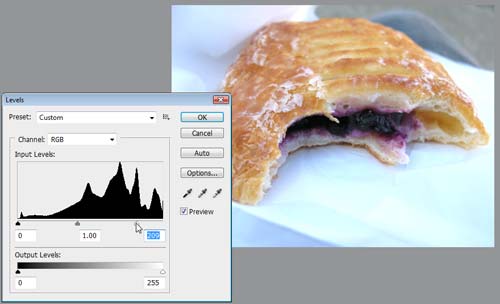
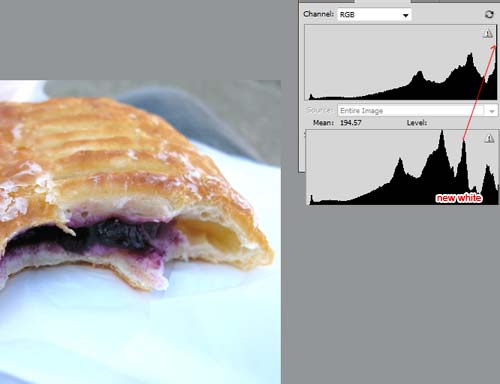
Move the White Slider in Input Levels to the left. Whichever Level or Peak the white slider falls under becomes the new white, and everything to the left of the white slider gets stretched out as the new histogram. Everything to the right of the white slider is discarded and turned into bright white. So use this with caution, as it destroys details in areas with delicate contrast, like the subtle grays that make up swirls in whipped cream. If you take the white slider too far, it will look like a plain (ugly) white mass.
Making Shadows Darker
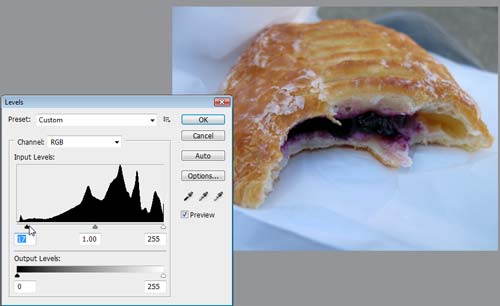
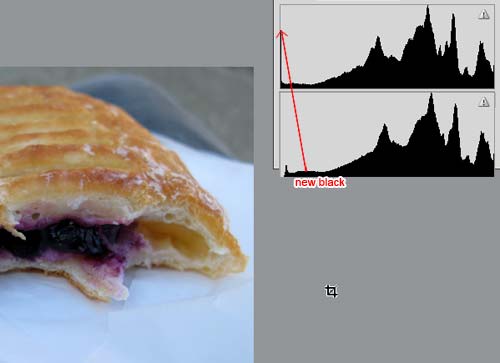
Move the Black Slider in Input Levels to the right. Whichever Level or Peak the black slider falls under becomes the new black, and everything to the right of the black slider gets stretched out as the new histogram. Everything to the left of the black slider is discarded and turned into pitch black. So use this with caution, as it can quickly make your image look muddy.
Lightening Midtones
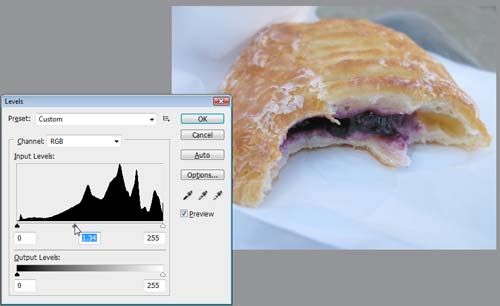
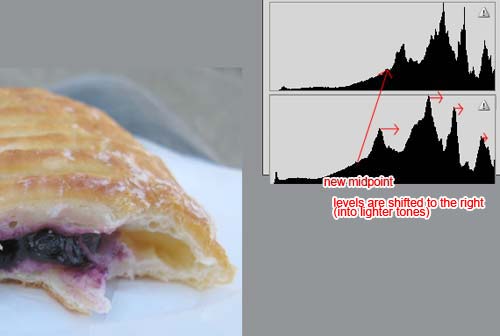
Move the Gray Slider to the left. Whichever Level or Peak the gray slider falls under becomes the 50% midpoint, and everything to the right of it becomes lighter than 50% gray, hence the entire image is lighter. If you don't move the white or black sliders, white is preserved as white and black is preserved as black.
Darkening Midtones
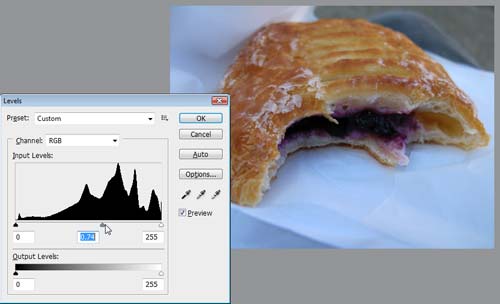
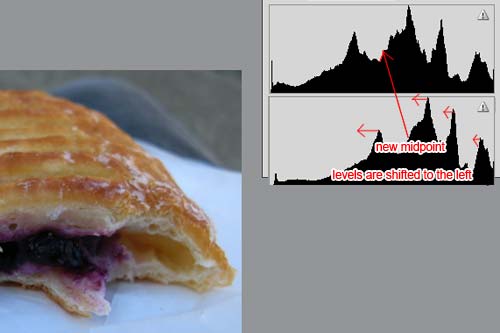
Move the Gray Slider to the right. Whichever Level or Peak the gray slider falls under becomes the 50% midpoint, and everything to the left of it becomes darker than 50% gray, hence the entire image is darker. If you don't move the white or black sliders, white is preserved as white and black is preserved as black.
Increasing Contrast
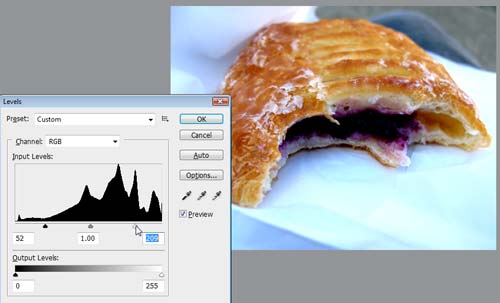
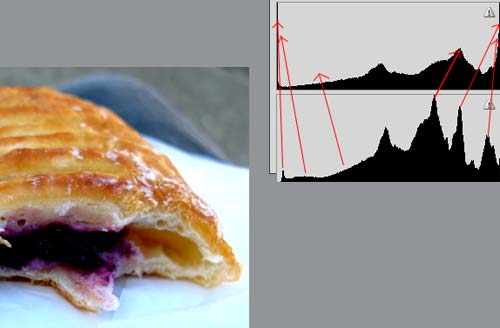
If you make a white whiter and a black blacker, you are naturally increasing contrast. So moving the sliders closer together would increase contrast. In this example, we've moved the sliders closer symmetrically, but in practice, they are rarely moved together symmetrically - blacks and whites need to be adjusted independently based on what you want the image to look like.
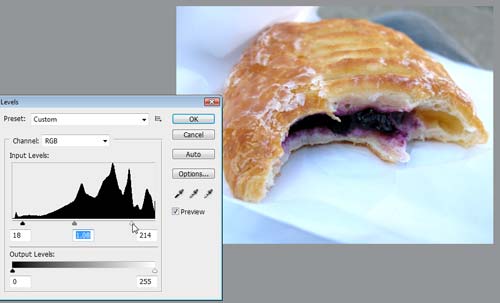
... Like so.
Graying Whites
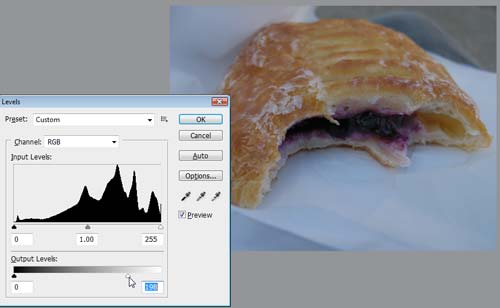
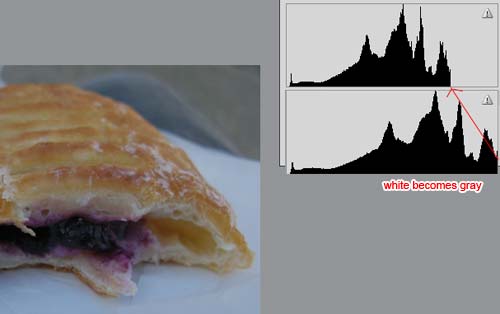
Moving the White Slider in Output Levels to the left makes the white grayer. You'll only need this if the whites in an image are too bright or harsh - it decreases contrast (moves peaks closer together).
Graying Blacks
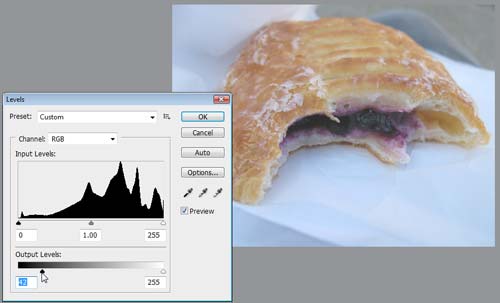
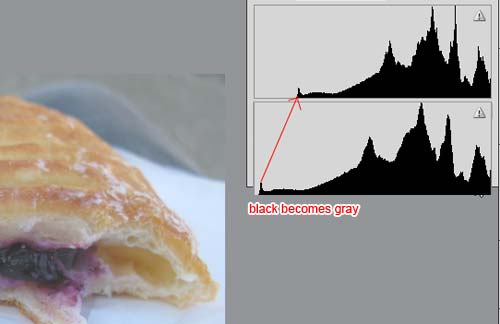
Moving the Black Slider in Output Levels to the right makes the black grayer. You'll only need this if the shadows in an image are too dark. It also decreases contrast.
Oldest, Neatest Trick in the Book - Choosing a White Point
You'll notice that so far, there has been a bluish cast over my entire photo. Choosing the White Dropper and clicking on the image as to what should be bright white not only does this, but also removes any color cast over the image.
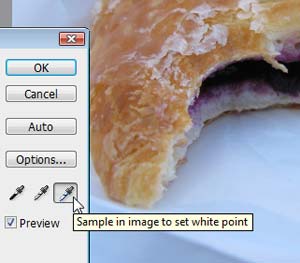
Notice how instantly the image improves! If you chose a wrong area, simply click somewhere else and it will adjust.
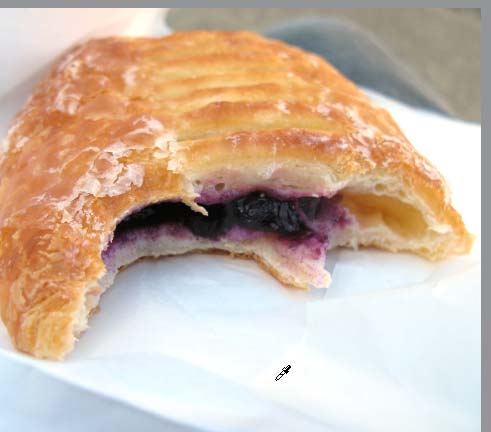
All that's left to do is fix my black point and midpoint manually and the image is perfect.
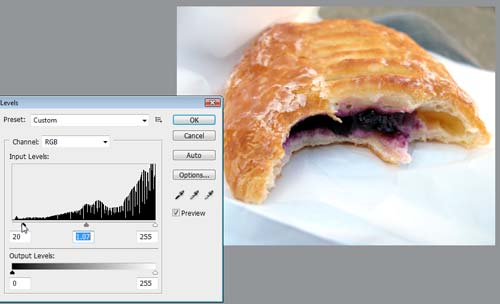
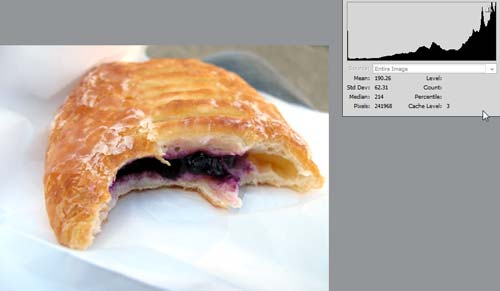
New image, new histogram.
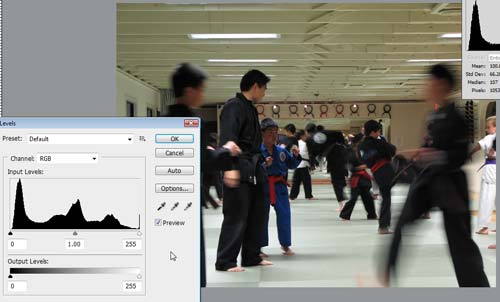
A Final Example
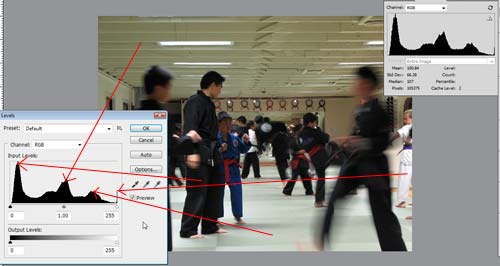
Here's a brief summary of what these levels represent in the image:
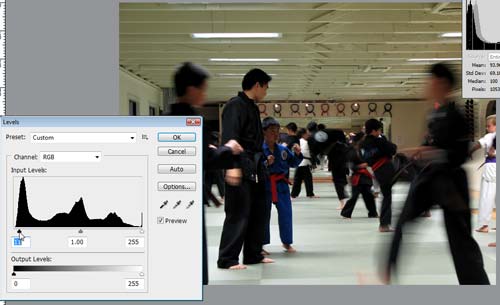
Making the uniforms darker:
Overdoing it and making the uniforms pitch-black with no highlights, and the whole image muddier:
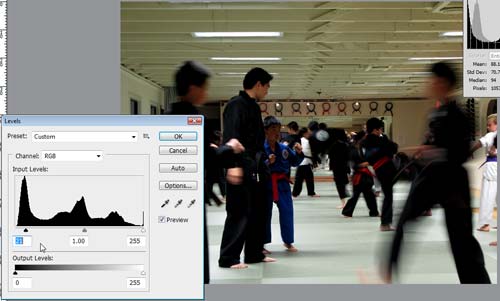
Making the lights and white uniforms brighter:
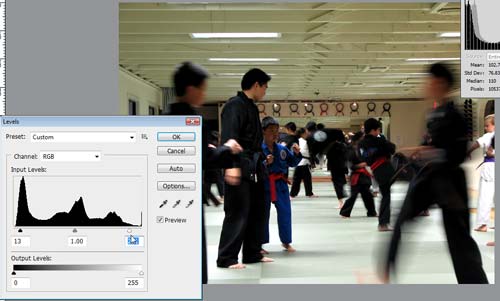
Overdoing it and completely burning out the floor:
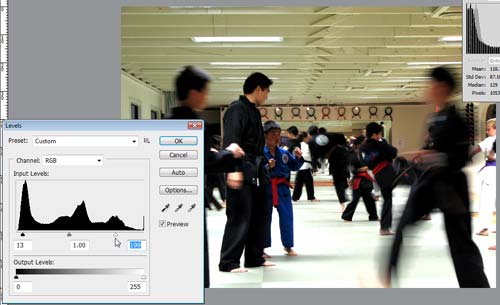
Moving the gray slider to the left to make the midtones brighter and pop out:
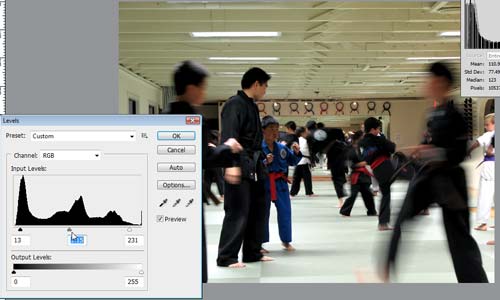
So, that's a pretty comprehensive look at the Levels tool. Take your low-contrast, color-cast, dull photos and PLAY AROUND! Move the sliders, use the dropper to pick out a white point, a black point, and a 50% gray-point just to see what happens. Pretty soon, using Levels will be pretty intuitive. And that's how you turn dingy into bright!


