Photoshop: Using the Image Processor
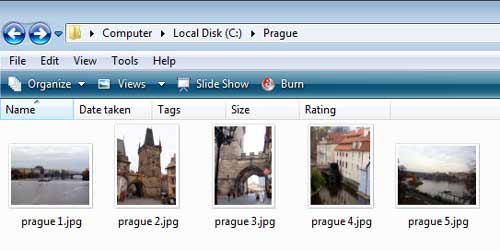
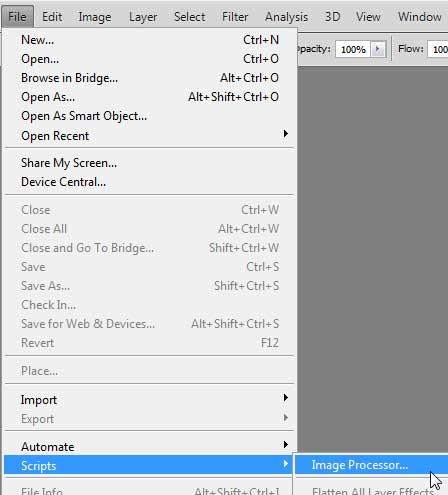
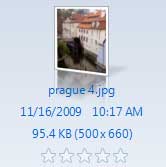
The Image Processor is a script included with Photoshop that enables you to automatically resize and save multiple files, with additional options if you want to make small adjustments. For this lesson, I'm going to process the folder I have above, containing large pictures of Prague.On the menu select File > Scripts > Image Processor...
This is what the dialog box looks like. Let's go over the options and explain them:
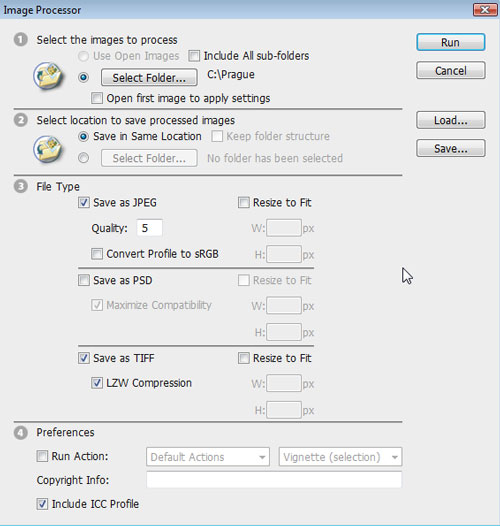
1. Select the images to process. You can use either the images already open in your Photoshop window, or select a Folder full of images that Photoshop will open for you. You can even check the box above to include sub-folders, if you want Photoshop to open them and process them as well. You can check Open first image to apply settings if you use a DSLR and have a folder of images in the RAW format. It will open the first image, and you can change the exposure or whatnot, and Photoshop will apply the same changes to the rest of the files automatically. Unfortunately I don't have a DSLR so I can't show this feature to you.
2. Select location to save processed images. I've checked Save in same location, but actually, Photoshop will automatically make a sub-folder with another name so you don't get confused. Image Processor will never overwrite files (it will rename your new files), so you can breathe easily if you make a mistake. If in Step 1 you've chosen to process files already open in Photoshop and they all come from different folders, checking Keep Folder Structure will make the new files in their respective folders. You can also check Select Folder if you want to decide for yourself where the new files will go.
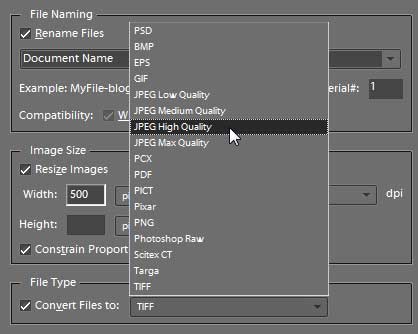
3. File type. Photoshop gives you 3 formats you can choose to save as. You can even choose all 3 of them and Image Processor will make a new folder for each one. We'll look into this a little more in-depth later.
4. Preferences. These are advanced options I haven't taught yet, but for now we can leave this alone. Include ICC Profile is of interest to designers and photographers who want to preserve accurate color profiles, but for now we'll leave it checked.
Load/Save. If you frequently use particular settings in Image Processor, you can save them for loading later so you don't have to keep putting in the same values again and again.
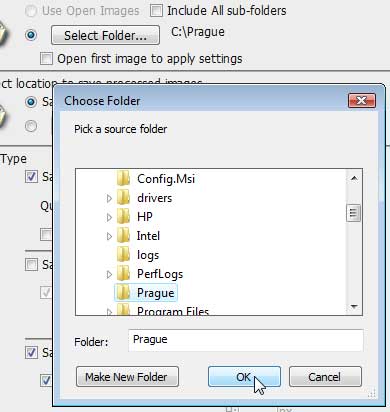
So let's begin. In Step 1, choose the folder you want to process.
In Step 2, we'll just save at the "same location".
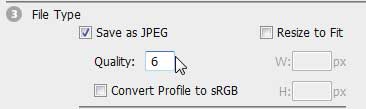
In Step 3, I'm going to use the JPEG format to save. Of course, because it's the format that's actually useful on the Internet. You can choose a Quality of 0 to 12, 0 being absolute compressed crap with a teeny-tiny file size and 12 being an almost-faithful reproduction of your original image at the cost of a massive file. There is no way to really tell using the Image Processor how big your files are going to be or how good they will look at a given number, so just go by feel and if you don't like it, just do over at a higher or lower quality.
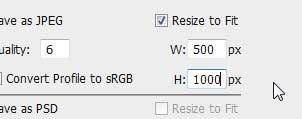
If you leave Resize to Fit unchecked, your images are going to be as big (width and height) as the originals. For blog purposes, the concern is usually a particular width (up to you: mine are 500 pixels wide). Image Processor does not distort or crop images. You must put a value for both width and height. Image Processor will just ensure that the image will fit an imaginary box of these dimensions while maintaining the image's correct proportions. Because I really don't care how tall my images will be (I just want them to be 500 pixels wide), I put 500 in width and a big number (1000 in this case) for height. Image Processor will scale your images so that 500x1000 will be the maximum dimensions. (So, if my image is more than 2 times high as it is wide, it will be less than 500 pixels wide, unfortunately, if I leave the height value at 1000. Put it at 100000 if you want to be sure everything will be 500 pixels wide.)
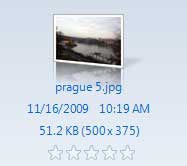
Click OK. After a while, Photoshop will be done and you have a new sub-folder in your original folder.
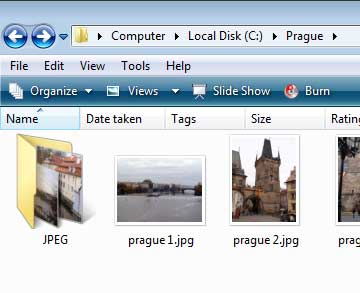
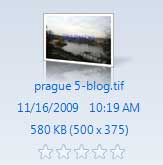
As you can see, the dimensions of the newly created files don't exceed 500x1000.
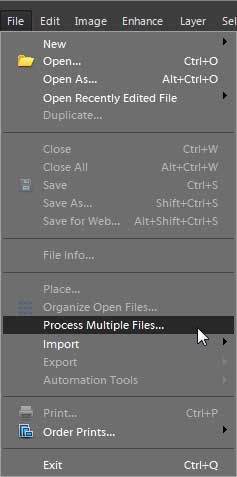
Elements: Using Process Multiple Files
Elements has only one function to do this, and it is actually much more powerful than Photoshop's Image Processor feature. On the menu, select File > Process Multiple Files...
The dialog box that pops up looks much more frightening than Photoshop, but it's really not complicated. We'll go over each of the options.
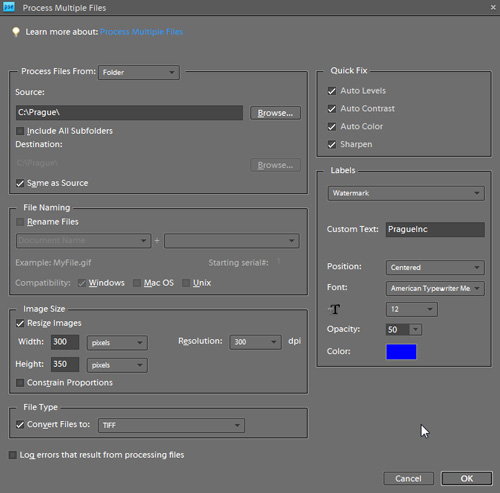
Process files From. You can specify a folder, which is usually the easiest thing to do. You can also choose whatever's currently opened in your Elements window, or an attached device like a scanner (Import).
Source. Choose the folder that contains all the files you want to process. You can check Include Subfolders if you like to process everything under it too.
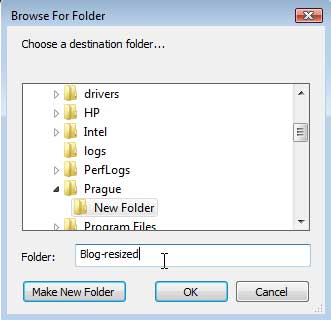
Destination. For Elements, it is advisable to specify your own folder and NOT to check "Same as Source". This is because it will overwrite your files if you're not careful.
So that's what we'll do. Uncheck "Same as source" if it's checked and choose your destination folder. We'll create a new one called "Blog-resized".
File renaming. If you click on the drop arrows, you'll see a lot of fun ways to automatically name the files Elements will create. I find that the simplest way is just to add a suffix. For this example, I just typed in "-blog" and my new files will just be called "prague-1-blog.jpg" and so on.

Image Size. You'll nearly always want to make sure Constrain proportions is checked, because Elements can distort your images. If it's checked, just name either the exact width (or height) that you want for all your images and Elements will automatically calculate the proportionate other dimension. If it's unchecked, you have to specify both a width and a height and Elements will stretch or shrink your images to fit that exact box, which can result in fat or thin images if you're not careful. For internet purposes, Resolution does not matter. It only matters if you're printing them.

File type. Choose from a menu of predefined specifications. For blog purposes, JPEG Medium or High should suffice (you don't want your website to be a pain to load, or a pain to look at).
So, almost done. Let's look at the rest of the options:
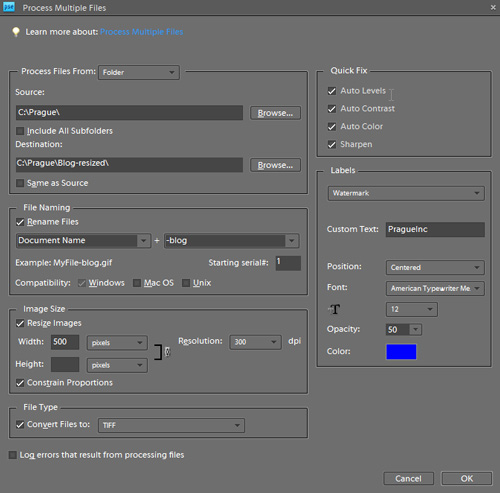
I haven't taught what these mean yet, but you can check Auto Levels, Auto Contrast, Auto Color, and/or Auto Sharpen if your original images are dull and/or kind of blurry and you want Elements to automatically fix them to you based on its artificial intelligence. Up to you. If you want your images exactly as they are color and contrast-wise, leave these boxes unchecked.
Labels allows you to put a Watermark or a Caption. Leave the text box blank if you don't want a watermark, but if you do, you can specify what text appears (maybe "(c) Mark Manguerra" or something), where it appears (center/bottom left/bottom right), the font, color, size, and opacity. There are some neat options for Caption too, like putting the file name, description, and/or the date the image was modified.
Click OK.
In your specified folder ("blog-resized" in my example), you'll find all the new files, resized, watermarked, compressed, and a suffix added to the filename.
If you have any questions, feel free to shoot me a comment. I hope this feature comes in very handy.


